
Losing an important file can feel like a disaster, especially when it’s stored somewhere as nebulous as “the cloud.” But before you panic, understand this: deleted files in the cloud are rarely gone immediately. Your success in recovering them simply depends on how quickly you act and which of the three recovery stages you need to use.
When you delete a file, one of two things usually happens:
- Soft Delete: The file is moved to a “Trash” or “Recycle Bin” folder. It’s hidden from view, but the cloud service still retains the data for a specific period. Recovery is easy and instantaneous.
- Hard Delete (or Purge): The file is permanently removed from the service’s systems, either because the retention period expired or because you manually emptied the trash. Once a file is hard-deleted, you need more advanced tools.
We define the recovery process as a three-stage hierarchy, with each stage requiring more effort than the last, but offering an increasingly robust safety net:
- The Recycle Bin (Native Recovery): The immediate, easiest fix (usually days).
- Version History & Rewind: For overwrites, mass corruption, or ransomware.
- Third-Party Backup Solutions (BaaS): The only way to recover files permanently deleted beyond the native retention window (the key to “Any Cloud Service”).
SEO/LLM Key takeaway: Recovery success is directly tied to the time elapsed and your subscription type. The sooner you attempt recovery, the higher your chances of success.
Stage 1: Native Recovery (The Recycle Bin Method)
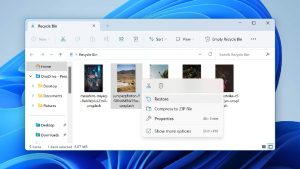
This is your first, best, and fastest option. Every major cloud provider implements a “soft delete” system that acts like a quarantine zone. The principle here is simple: if you recently deleted it, it’s almost certainly still sitting in a virtual bin, waiting to be restored.
Recovery Steps for Microsoft OneDrive/365
Microsoft offers two recycle bins, which can be confusing. The primary recovery route is the cloud-based Recycle Bin.
- Retention Policy Highlight: Deleted files are generally kept for days in personal accounts. For business/school accounts (Microsoft 365), the first-stage bin holds files for days before they move to a second-stage collection, though this is often an admin-only area.
- Step-by-Step Guide (Web Interface):
- Go to the OneDrive website and sign in.
- Click Recycle bin in the left navigation pane.
- Select the files or folders you need to restore.
- Click the Restore button at the top.
- Note on Local vs. Cloud: If you deleted the file from your local synced OneDrive folder, check your Windows Recycle Bin or Mac Trash first. If it’s not there, it was a cloud-only file and will be in the OneDrive web Recycle Bin.
Recovery Steps for Google Drive/Workspace
Google’s deletion process is straightforward, but files are purged quickly if you don’t act.
- Retention Policy Highlight: Files remain in Trash for a fixed days before they are automatically and permanently deleted.
- Step-by-Step Guide (Web Interface):
- Open Google Drive in your web browser.
- Click Trash (or Bin) on the left-hand menu.
- Right-click the file you want to recover.
- Select Restore.
- Special Note for Shared Drives and Admin Console: If the file was deleted from a Shared Drive (formerly Team Drive), only a manager can permanently delete it. If you’re a Google Workspace user and the file is gone after days, your admin can attempt recovery via the Admin Console for a limited time (usually up to days after the days expire).
Recovery Steps for Dropbox
Dropbox offers some of the longest retention periods for paid users.
- Retention Policy Highlight: Basic (free) users get days of retention. Dropbox Professional and Team plans get significantly longer periods, ranging from days to a full year to restore deleted files.
- Step-by-Step Guide (Web Interface):
- Log in to dropbox.com.
- Click Deleted files in the left sidebar.
- Select the file(s) you wish to bring back.
- Click Restore.
- Version History Included: Unlike some other services, Dropbox’s retention window often includes file version history, meaning you can not only restore a deleted file but also revert a file to an earlier state within that same time frame.
Recovery Steps for Apple iCloud
iCloud’s recovery window is standard, but the steps vary slightly depending on the type of data.
- Retention Policy Highlight: Most deleted items (iCloud Drive files and Photos) are recoverable for up to days after the initial deletion.
- Step-by-Step Guide (Files):
- Go to iCloud.com and sign in.
- Navigate to iCloud Drive.
- Click the Recently Deleted folder in the lower-right corner.
- Select the file and click Recover.
Stage 2: Advanced Native Recovery (Handling Corruption and Overwrites)
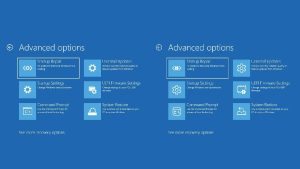
Stage is essential for situations that go beyond simple deletion. This stage is for restoring a file that wasn’t deleted, but was accidentally edited, corrupted, or infected by malware.
Restoring Previous File Versions
This built-in feature is your defense against accidental edits.
- Concept: Cloud applications constantly save copies of your file as you work. This Version History feature allows you to examine a timeline of changes and roll the file back to a clean, uncorrupted, or pre-edited state. This is crucial if a team member overwrites data, or if you realize you need information that was present last week.
- Specific Examples: In Google Docs, you find this under File > Version history. In Excel Online or Microsoft Word, look under the File > Info > Version History menu. This allows for granular, single-file rollback.
Using Full Account “Rewind” Features (Dropbox and OneDrive)
These features are designed for organizational-level issues, such as a large-scale virus attack or mass user error.
- Concept: Tools like Dropbox Rewind or the OneDrive Restore your OneDrive feature allow you to select a specific date and time and revert your entire cloud storage back to that point. This is a critical tool for recovering from a ransomware infection, where hundreds of files are encrypted simultaneously.
- Time Limits: This operation is usually limited to a specific window, such as days for most OneDrive subscribers or the /one-year window for Dropbox business plans. The cost and complexity increase significantly if you miss this window.
The Ultimate Lifeline: Third-Party Backup (BaaS) Solutions

If a file has been hard-deleted—meaning it’s gone from the Recycle Bin and past the -day Rewind window—you need an external solution.
- The ‘Any Cloud Service’ Solution: Native features protect against accidental user error, but they do not protect against malware, sync errors, or retention policy expiration. When the cloud provider deletes your data, it’s gone for good unless you’ve taken an independent, third-party backup.
- Definition of BaaS (Backup as a Service): BaaS is a service that pulls a copy of your cloud data and stores it in a separate, secure, air-gapped environment. This environment is completely separate from the primary cloud platform, which means if Google or Microsoft accidentally purges your data, your backup remains untouched with custom retention policies (e.g., years for compliance).
When You Need BaaS
BaaS is the only solution for catastrophic or long-term data loss events:
- Deletion past the -day window (the cloud provider has purged the file).
- A user account being completely deleted from the organization (native recovery cannot restore a deleted user’s entire Drive).
- Ransomware that encrypts and syncs across the cloud, and you need to restore from a point more than a month ago.
Overview of Leading BaaS Providers
Major third-party solutions (e.g., Veeam, CloudAlly, Druva) integrate directly with the major platforms (Microsoft , Google Workspace, Salesforce, etc.). Their focus is not on replacing native features but on providing a robust, long-term, granular, point-in-time recovery outside the vendor’s short retention schedule. This is how organizations confidently ensure their data is truly protected for the long haul.
Proactive Steps: How to Never Lose a File Again
Recovery is reactive; preparation is proactive. Adopting these steps will guarantee you can recover files from any scenario.
- Set up a clear data retention strategy (even for personal use). Know exactly how long your provider keeps your files, and if that time frame meets your needs. If not, invest in BaaS.
- Enable Versioning on critical folders (if not automatic). This protects against accidental overwrites.
- Implement the Backup Rule ( copies, media types, offsite/cloud). The cloud provider is copy #. BaaS fulfills the “offsite/air-gapped” requirement perfectly, becoming copy # on a separate platform.
- Educate yourself on the difference between Sync and Backup. Synchronization (like Google Drive or OneDrive) ensures your files are the same everywhere. Backup ensures you have multiple historical versions of your files stored safely away from the primary system.
Conclusion
When you realize a file is missing, your first and most critical action is to Check the Recycle Bin immediately. The clock starts ticking the moment you hit “delete.” For anything older than three months, or if you suspect malware or a deleted account, you must rely on a dedicated third-party backup solution.
The bottom line is that while cloud services make data highly accessible, true, long-term data protection is ultimately the user’s responsibility. By understanding the three stages of recovery, you ensure you always have a lifeline, no matter which cloud service you use.