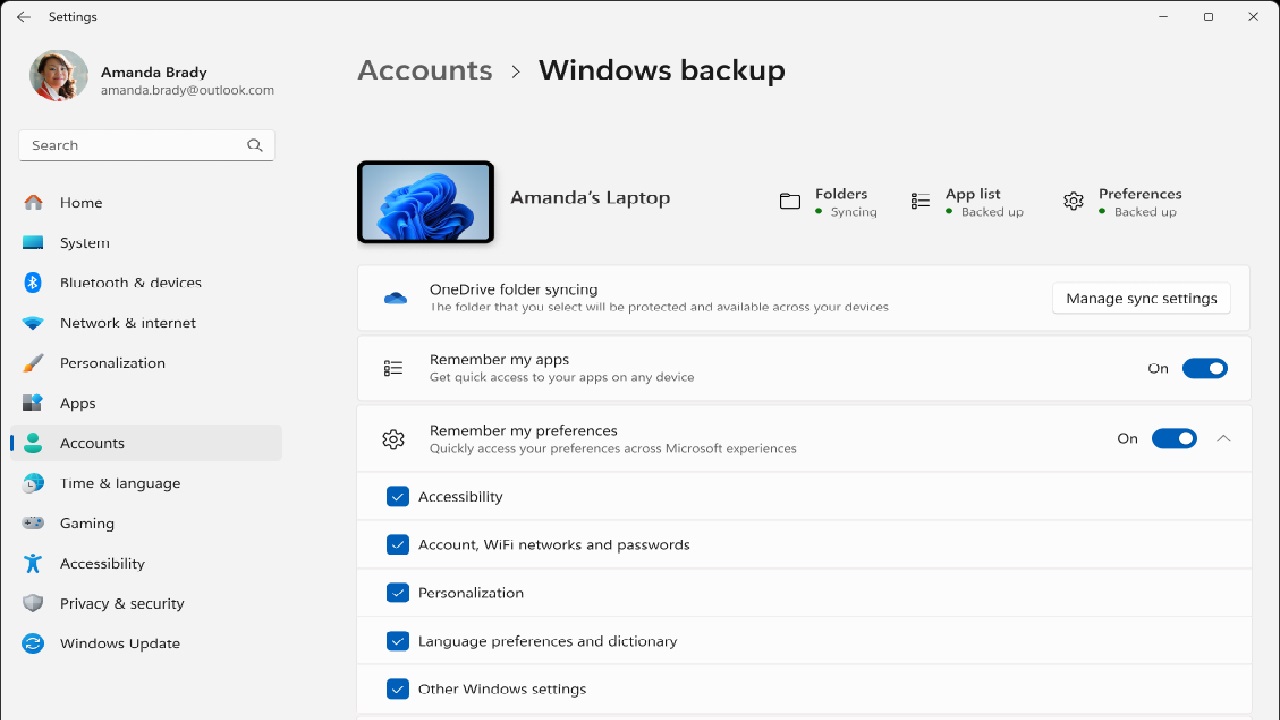
Backing up your data is like having a safety net for your digital life. Whether it’s precious family photos, important work documents, or your favorite music collection, losing them can feel like a punch to the gut. Fortunately, Windows offers built-in tools to help you safeguard your files with its Backup and Restore feature. If you’re new to this, don’t worry—this guide is designed to walk you through the process step by step, with a human touch to make it as clear and approachable as possible. By the end, you’ll know exactly how to back up your files and restore them if disaster strikes.
Why Backing Up Your Data Matters
Imagine this: your computer crashes, or you accidentally delete a folder full of irreplaceable memories. Without a backup, those files are gone forever. Backing up your data ensures you have a copy stored safely, ready to restore when needed. Windows Backup and Restore, available on Windows 7, 8, 10, and 11, is a user-friendly tool that lets you save your files to an external drive, network location, or another safe spot. It’s simple, reliable, and doesn’t require you to be a tech wizard.
This guide is perfect for beginners who want to protect their data without getting overwhelmed by technical jargon. Let’s dive into the process, starting with what you’ll need and how to set it up.
What You’ll Need to Get Started
Before we jump into the steps, let’s make sure you have everything ready:
- A Windows PC: This guide works for Windows 7, 8, 10, or 11.
- An External Storage Device: An external hard drive, USB flash drive, or network-attached storage (NAS) with enough space to hold your files.
- A Bit of Time: Setting up a backup for the first time might take 10–30 minutes, depending on how much data you’re saving.
- Patience: If you’re new to this, take it slow. You’ve got this!
Got everything? Great! Let’s start with setting up a backup.
Step-by-Step Guide to Backing Up Your Files
Step 1: Open Backup and Restore
First, you need to find the Backup and Restore tool on your Windows PC. Here’s how:
- On Windows 10 or 11:
- Click the Start button (the Windows logo) in the bottom-left corner.
- Type “Backup and Restore” in the search bar.
- Select Backup and Restore (Windows 7) from the results. Don’t worry about the “Windows 7” label—it works perfectly on newer versions too.
- On Windows 7 or 8:
- Open the Control Panel (search for it in the Start menu).
- Click System and Security, then find Backup and Restore.
Once you’re in the Backup and Restore window, you’ll see options to set up a backup or restore files. Let’s focus on creating a backup first.
Step 2: Set Up Your Backup
- In the Backup and Restore window, click Set up backup on the right side. Windows will take a moment to initialize the tool.
- Choose where you want to save your backup. You’ll see a list of available drives, like your external hard drive or a network location. Select your preferred destination and click Next.
- Tip: An external hard drive is the most reliable choice for beginners. Make sure it’s plugged in and has enough free space.
- Windows will ask what you want to back up. You have two options:
- Let Windows choose: This automatically backs up common folders like Documents, Pictures, and Desktop, plus a system image (a snapshot of your entire system).
- Let me choose: Pick specific folders or files. This is great if you only want to back up certain things, like your photo collection or work documents.
- For beginners, “Let Windows choose” is a safe bet. You can always customize later.
- Click Next, review your settings, and click Save settings and run backup. Windows will start copying your files to the chosen location. Depending on how much data you have, this could take a while—grab a coffee and let it do its thing!
Step 3: Schedule Automatic Backups
One of the best parts of Windows Backup and Restore is that you can set it to run automatically. No need to remember to back up every week! Here’s how to schedule it:
- In the Backup and Restore window, click Change settings or Set up backup again.
- After selecting your backup destination and files, click Change schedule.
- Check the box for Run backup on a schedule.
- Choose how often (daily, weekly, or monthly) and when you want the backup to run. For most people, a weekly backup at a time when your computer is on (like Sunday evening) works well.
- Click OK, then Save settings and run backup.
Now your files will be backed up regularly without you lifting a finger. How’s that for peace of mind?
Step 4: Check Your Backup
Once the backup is complete, it’s a good idea to verify it worked. Open your external drive or backup location and look for a folder named after your computer (e.g., “PC-Name”). Inside, you’ll see your backed-up files or a system image. If everything looks good, you’re all set!
How to Restore Files from a Backup
So, you’ve got your backup ready, but what happens if you need to recover your files? Maybe you accidentally deleted an important document or your computer crashed. Here’s how to restore your data:
- Open Backup and Restore: Follow the same steps as above to get to the Backup and Restore window.
- Click Restore my files or Restore all users’ files (if you’re an admin).
- Browse or search for the files you want to restore. You can select specific files or entire folders.
- Choose whether to restore files to their original location or a new one. If you’re unsure, restoring to a new folder (like your Desktop) is a safe option to avoid overwriting anything.
- Click Restore, and Windows will copy the files back to your computer.
If you created a system image and need to restore your entire system (like after a hard drive failure), you’ll need a Windows recovery drive or installation media. Boot from that media, choose System Image Recovery, and follow the prompts to restore your system.
Tips for a Foolproof Backup Strategy
Now that you know how to use Windows Backup and Restore, here are some extra tips to keep your data extra safe:
- Use Multiple Backups: Don’t rely on just one backup. Consider a second external drive or a cloud service like OneDrive or Google Drive for offsite storage.
- Check Your Backup Drive Regularly: Make sure your external drive is working and has enough space. A failing drive can ruin your backup plan.
- Keep Your Backup Secure: Store your external drive in a safe place to protect it from theft or damage. If you’re using a network location, ensure it’s password-protected.
- Test Restores Occasionally: Every few months, try restoring a file to make sure your backups are working as expected.
- Update Your Backup Schedule: As you add more files (like new photos or work projects), make sure they’re included in your backup settings.
Common Questions About Windows Backup and Restore
How Much Storage Do I Need for a Backup?
It depends on how much data you have. Check the size of the folders you want to back up (right-click and select Properties). Add some extra space for future files. For a system image, you’ll need enough space for your entire Windows installation, which could be 50–100 GB or more.
Can I Back Up to a USB Flash Drive?
Yes, as long as it has enough space. However, external hard drives are better for large backups since they’re more durable and have higher capacities.
What’s the Difference Between a Backup and a System Image?
A backup saves your files and folders, like Documents or Pictures. A system image is a complete copy of your Windows system, including settings, programs, and files. Use a system image to recover your entire PC after a major failure.
How Long Does a Backup Take?

The first backup can take anywhere from a few minutes to a few hours, depending on the size of your data and the speed of your drive. Subsequent backups are faster since Windows only copies new or changed files.
Troubleshooting Common Backup Issues
- Backup Fails to Start: Ensure your external drive is properly connected and has enough free space. Try a different USB port or cable.
- “Not Enough Space” Error: Check if your backup drive has enough room. You may need to delete old backups or get a larger drive.
- Files Missing from Backup: If you chose “Let me choose,” double-check that you selected all the folders you need. Update your settings if necessary.
- Restore Not Working: Make sure you’re restoring from the correct backup and that the files haven’t been corrupted. Test your backup drive for errors.
If you run into persistent issues, Microsoft’s support website or community forums can offer additional help.
Why Windows Backup and Restore Is Great for Beginners
Windows Backup and Restore is a fantastic tool for beginners because it’s built into your operating system—no need to buy or download extra software. It’s straightforward, supports automatic scheduling, and can save both your files and your entire system. Plus, it works across multiple Windows versions, so you don’t have to learn a new tool if you upgrade your PC.
Final Thoughts
Backing up your data doesn’t have to be complicated or intimidating. With Windows Backup and Restore, you can protect your files in just a few clicks, giving you peace of mind that your digital life is safe. Whether you’re safeguarding family photos, work documents, or your entire system, this tool has you covered. Follow the steps in this guide, set up a schedule, and rest easy knowing you’re prepared for the unexpected.
If you found this guide helpful, consider sharing it with friends or family who could use a little backup know-how. And if you have questions or run into issues, drop a comment below or check out Microsoft’s support resources. Happy backing up!

